Showing posts with label Convention. Show all posts

Tuesday, May 16, 2017

Bear with Sticky Boy Congrats Card

One of the big trips my CTMh team makes each year is to the CTMH Convention each summer. We love to travel in a group, and we often work together on extra projects to get ready for our trip - t-shirts, gifties, swaps, etc... It's only a little over a month before we jet off to Utah, so I've got a bit of Convention-on-the-brain-itis!
So when I won my new Jack Cardmaking set with this adorable big ol' bear who can HOLD ALL THE THINGS (Thanks, Naomi!) the first thing that popped in my mind was my tiny Sticky Boy stamp. It's a thing at CTMH conventions - they hide this stamp image in various sizes all over the place. He's even got his own Facebook page. You never know when or where you'll find one, and it's like finding the pot of gold at the end of a rainbow when you do. Mine is a tiny little 1x1 image, just right to hang out with this bear. 
I paired my bear and Sticky Boy with my favorite new print from this Seasonal Expressions, the tiny heart print from Little Dreamer. I colored the images with watercolor pencil, lightly blended with a small water brush. And I couldn't resist giving this big bear some big wiggly eyes. This card is based on the fun new sketch over at Atlantic Hearts Sketch Challenge - pop over there to share a card of your own! I'm also linking up to the Heart 2 Heart Teeny Tiny Challenge!

Saturday, June 25, 2016

Find Joy in the Journey Layout

One final piece of Inside Out art...this is my layout for this years convention art contest. I wanted to build the memory ball system from cardstock!
I Cricut cut a bazillion tiny 1/2 inch balls, which I individually  inked, pearlized with Wink of Stella and glittered. I cannot tell you how much I love these memory balls! I lined them up on glitter paper rows, and hand stitched between with silver thread. Then I added a swirl of bigger memory balls over top the rows of neatly stored memory balls. You can imagine the fun my kiddos and I had trying to take these silly emotion selfies!
Here you can see a bit more of the sparkle. My niece is the genius who pointed out to me that JOY is literally in the word Journey. I painted my title letters with layers of watercolor paints before adding the sparkle to make them match the tiny memory balls. I love working on an intricate layout like this. It gives you a lot of time to ruminate on a topic deeply, and I feel working on this layout really helped me to feel better about the moving and change I've experienced my whole life. Scrapbooking = cheap therapy!

I hope you find JOY on your Journey today, Stamping Friends!

Friday, June 24, 2016

Bing Bong Flower Button

Speaking of using the Cricut drawing feature, I also made these adorable Bing Bong flower name tags for my ladies. Can you just picture my littles running around singing "Who's your friend that loves to stamp?"? Too much fun!
I used a basic oval shape to form the Bing Bong Flower. That's on one of the cartridges that's retiring soon, Art Philosophy, and it's also one of my very most favorite Cricut cartridges ever and I'm utterly heartbroken it's going away. Well, I'm heartbroken for you if you don't have it, 'cause I'm keeping mine forever! I literally us this cartridge every time I Cricut. I topped off my flower with a standard button and a whole lot of green stickles. I love Bing Bong...and stamping...and glitter! 

Thursday, June 23, 2016

Find the Fun Shaker Button

Another Convention tradition for my team is that each year I make a special convention badge for my traveling peeps. This year I found these adorable empty shaker buttons at Michaels. 
Our convention theme this year is based on the movie Inside Out, which has been a big movie around my house considering our recent move. We really love this movie so I made a lot of Inside Out projects. I downloaded a free Inside Out Font, which worked great with my Cricut and the writing/draw option. I had the Cricut write my button saying and cut the round button inserts. Then I added a fussy cut pic of a CTMH mascot names Sticky Boy, and filled my shaker button with glitter and "memory balls". Then I sealed the back with Liquid Glass, just in case!

Wednesday, June 22, 2016

Life is Better with Friends Frame

One of my favorite parts of traveling with my team for Convention each year is the exchanging roomie gifts. I often make something for all my traveling ladies instead of just my roommates, because it's just too much fun!
This year we are in Orlando, so I went with a gold glittered Flamingo frame! You might remember me posting on Instagram a week ago about running out of gold glitter....now you can see why.
I used the new Tickled Pink stamp set, which has a coordinating set of Thin Cuts dies. I also gave up a bit of my wide gold stripe hoard from the May Happy Times special. That's how they know I really {heart} them! I can't wait to pass these out to my peeps today!

Friday, December 25, 2015

Day 307: Free Disney Mini Album Instructions

Merry Christmas, Stampin' Friends! It's been a busy but happy day here today. After we put the boys to bed, I was pondering what to share with you today...and I realized I have one project left from my Convention Presentation this summer that I never shared with y'all. I meant to, but I was finishing the instructions and then it just got away from me.
I made this adorable Disney Mini Album using lots of Cricut cuts, the PML Gold Overlays, and the Reel Life stamp set. It was so much fun to build, and quick to fill. I'm sharing the instructions (with lots more pics) for this cutie for free - just email me and I'll shoot you a PDF. You can grab the Cricut Design Space cut file here. I'm linking this project up to the Heart 2 Heart Gifts from the Heart challenge. 

Merry Everything, Stampin' Friends!

Saturday, October 17, 2015

Day 238: Life is Looking UP Disney Layout

I finally finished my UP layout from July's convention, picture and all! 
CTMH gave us this project to complete, and it's just gorgeous. The balloons are all cut from the new fundamentals paper Enchantment palette.
The sentiments running down the side here are a combo of stamps and fundamentals stickers. The gold stars and bow are from the gold assortment.
Here you can see the blue watercolor background they had us add. Finishing this page makes me even more excited to be attending the CTMH Consultant Album Retreat in November. I can't wait to see what they've cooked up for us to make!

Monday, September 14, 2015

Day 205: June Through The Year Pocket Scrapbook Layout

So when I got to June you can tell I was kind of getting over the whole slide the cards in and call it good thing. We had a good six month run.  I played nice...but I was ready to MAKE something. 
So I cut some White Daisy Cardstock to 4x6 and hit it up with my trusty corner rounder. Then I stamped the cards with So Many Smiles using Canary ink to go along with the actual Through the Year cards I was combining with my cards. I stamped them repeatedly without reinking so it would be a kind of soft ombre effect. On the first page I trimmed out some photos and added 1/4 inch strips of White Daisy CS for the journaling. I do still love me a fussy cut photo, especially when the background is, say, yet another trip to Target or something. 
Then I layered on some of my favorite new cards - the Gold and Silver Overlays. Can you say SWOON? I added one to each side, and then, because I often work in threes, I applied some Silver foil tape to the sunshine card...aaaand I added some very fussy stamping of the sentiments in the So Many Smiles set so it would actually say YOU ARE MY sunshine. Max and I sing that song to each other all the time. A few purple heart enamel gems finished off this page in record time, even though I went off-roading a wee little bit. Now I was finally really getting into the groove of this pocket scrapbooking...

Saturday, September 12, 2015

Day 203: May Through the Year Pocket Scrapbook Pages

On the May Through the Year Picture My Life pages I got a little creative with cutting the cards. 
I cut into that banner area on the Love This card, just enough to slide my photo and some silver foil tape under the edge. Then I trimmed the photo to match the shape of the card, and tacked the edge of the banner down with some glitter enamel dots.
I love the watercolor effect and the hand drawn font on these cards.

Thursday, September 10, 2015

Day 201: Through the Year March Pocket Scrapbook Layout

Here are the two March pages I made with the Through the Year cards for my Convention presentation. 
You can see here where I let some of the backside of the February cards peek into the March side. I love the selfies Ben took so much I actually have it framed in my living room display. I may even go back and make a layout just with that picture of him snapping endless amounts of the SAME selfie on my phone, but for now at least it can make me giggle every time I peruse these pages with my little guys.
How cute is that rainbow card? I added a lot of different little gems to go along with the rainbow idea. 
Even looking at these not so great pics of the pages makes me smile at these memories. I think that is the power of this Project Life pocket style scrapbooking. Just wait until my Shotbox gets here - I'm so redoing these pics!

Saturday, September 5, 2015

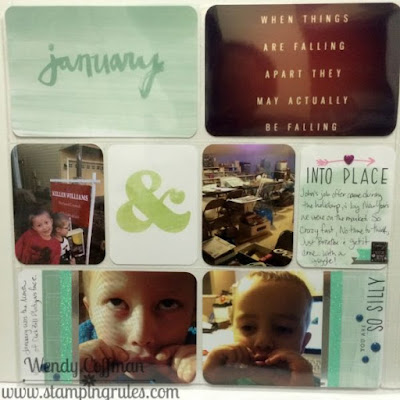
Day 196: Through the Year January Pocket Scrapbook Page

One of the pocket scrapbooking projects I completed for convention was scrapping a year's worth of photos from what I like to call my "random cell" file. Every month I move my pictures off my phone into folders on my laptop. I organize these by trip, kid, etc... and then I make a monthly folder full of the silly one-off pics I take of the kids and what we are doing each day.
As soon as I saw the Through the Year Picture My Life cards I knew they'd be perfect for scrapping these photos that I love, but never get scrapped because there's just one pic. For January of last year there weren't as many random photos (because we were getting ready to move) so I only made one page. I added some stamping with Jennifer's Hand, and some of the pretty new aqua shimmer trim.

I know I'm not likely to keep up with an actual Project Life scrap-every-week thing, and I can live with that. I'm a binge scrapper, when I find the time, I scrap...a lot. This round up of my favorite random pics fills that need for me. I'm planning to go back with the same card set and do previous years of "random cell" pics for a this is our life type album separate from all our other scrapping. I'll be sharing the rest of these pages throughout this month, as I grew braver with the cards as I became more comfortable with the pocket scrapbooking. 

Wednesday, September 2, 2015

Day 193: Childhood Pocket Scrapbook Layout

It's September! The new Idea book is LIVE, and I'm finally allowed to share all the fun and varied things I've been making and hiding since MAY. Since I'm feeling a little sniffly (yet still excited) about Max's first day of Kindergarten tomorrow, I'm going to start with this pocket scrapbooking page using the new Picture My Life Childhood line

So when CTMH asked me last Spring if I wanted to present something on the big stage at Convention in July, the only answer was, of course, yes, yes, yes, YES!!! All I knew is I was doing something with Pocket Scrapbooking, so I hit Pinterest and started studying, sketching, and dreaming. As Jill was explaining to me later what home office wanted my mind was racing with ALL THE THINGS I knew I could do with the new PML cards...until Jill was like:
 Whoa! Back that bus up. We want you to just make Pocket Scrapbook pages. 
Ok, she didn't put it like that, but kind of. Scrapbook some pages so simple my kid could do it. Do not Pass Go. Do not foof them up. Do not add more layers. Do not turn them into an interactive display. Just slide the cards in and add pictures. And I have to admit...

Never had I ever made an actual pocket scrapbook page. Cards, layouts, gift boxes, wall displays, you name it, I've made it all made with those sweet PML cards...but not a single solitary pocket page protector was actually scrapbooked with the many, many cards in my stash.  GULP!

My box with all the new PML lines in it arrived, and I was paralyzed with indecision seasoned with a huge heaping spoonful of don't-worry-just-like-1000-people-are-gonna-look-at-these simple one layer pages...on a humongo big screen. Once I finally got going though, I can't help but wonder why I'd never bothered to try actually scrapping this way before! Scrappin' Friends, ya'll know I am the girl who loves layers, glitter, flowers, and (let's just be honest here) STUFF on my pages. Pocket Scrapbooking was just too easy - slide the pics in, add a few cards, journal the story and BAM! pages were getting done so fast. 
I literally just added a few purple enamel and glitter hearts to this page. I stamped the title using Typography in Lagoon ink. I felt done but it only took me ten minutes including fussing around with outlined the stamped title letters with a black fine tipped marker. 

Don't get me wrong - I still loves me some STUFF, especially glitterystampy, gotta get all the new stuff lumpy bumpy STUFF. But it was eye opening to me to think that I can spend my weekends making one or two really fabulous pages, and still keep myself caught up using pocket scrapbooking AND IT WAS STILL FUN!  I still felt like I was creating something beautiful, and the boys, well, they could not stop sneaking peeks at my presentation album  - and isn't that sharing of the stories with our littles central to why we scrapbook? 
Now that I've shared my (pocket) lesson learned with you, I'm linking this sweet Max coop preschool pocket page up to the Paper Issues You Rule the School Issue. The days are long but the years are short, Stampin' Friends. Capture those memories, whether you prefer a paper page, a digital layout, or just putting it all into a pocket. I'm off to hug my 5 year old and enjoy this last evening with my not-a-preschooler-anymore boy. Thanks for stopping by! 

Thursday, July 16, 2015

Day 145: Creativity Cricut Shirts

Cathy really embraced the quote shirt idea. She had me design three of them because she couldn't choose her favorite. She teaches at an elementary school, so these will be handy for her in the fall!
The Font is from Artiste, and the Swirl/heart element I welded from Art Philosophy shapes.
This one is all Artiste Font.
This last one we added a touch of Disney with the Waltograph font.
Tomorrow I've got one last set of Cricut vinyl shirts to share - all Disney Themed!

Sunday, July 12, 2015

Day 141: Convention Contest Layout

Each year at convention there's a big Layout Contest. This year's theme was Make It From Your Heart. I thought long and hard about how I wanted to express that theme, before taking a little bit of everything I love and putting it into one layout.
For the background I cut and sanded strips of Black Cardstock, then created the bold black stripes. I had seen this pic of a wedding bouquet on Pinterest and I wanted to turn that into a scrapbook page. I used this 2011 layout from a now defunct blog as a sketch of sorts, since I basically wanted to create my own B&T bar filled with pics of the artwork that I've made from my heart. I used Blossom and Chalk It Up B&Ts for that picture bar.
I cut the title from Gold Glitter paper using the Artiste cartridge font. I popped up the bigger letters using the Thin 3-D foam tape - this is my favorite foam tape ever! The first time I got it was on accident, because I hadn't realized we were carrying two widths of foam tape, and now I can't live without it. I added a ton of hand stitching in Gold thread using our Stitch Ruler.
I struggled with journaling this page a bit. It's hard to put into words why you love what you do sometimes. For me, I make things not just because it's fun, or glitter is cool, but because this craft allows me to spend time reflecting on the good in my life. Family. Friends. Love. Joy. Happiness. My life isn't perfect, but it's perfect for me. This craft renews my heart and makes me a better mom, wife, sister, and friend. It's like counting your blessings every time I make a page.  
Of course, I also find the process of creating pretty things from nothing but some white paper, ink, and water pretty fascinating. You can check out my Rolled Flower Tutorial for the lowdown on how I did these watercolor paper flowers. I find it so satisfying to create something from simple materials. 
Finally, instead of a banner I actually added my business card to this side of the layout. I usually put my class schedule on the back, but after my move I haven't started a regular schedule again yet. So this time I chose a quote.
I won't lie - this layout took me a while to finish. It was a labor of love, pure and simple. 

Saturday, July 11, 2015

Day 140: More Cricut Glitter T-shirts

Today I'm sharing the second round of my team's glitter quote shirts. Sorry for the glare on the screen shots - I thought I'd taken better pics, but apparently, well, not. 
On this design for Bonnie I pulled coffee cup and scissor images from Design Space. The font is Artiste. If I could still drink coffee, I'd totally wear this quote!
I grabbed a shot of what the image should look like when you mirror it before cutting. This is Amanda's quote, perfect for any avid scrapbooker. I added our camera image from Artbooking at the top. Say cheese!
Our sweet Karin chose a quote to inspire herself through this next year. It's a reminder we can all use from time to time.

Today started at 5 a.m., heading out to the CTMH Operation Smile 5K Fun Run. I did not run, but I did enjoy a brisk walk through both Disneyland and California Adventure in my new Tink Shirt with my girls! Then it's Extravaganza day...class after class with some of the top artists in CTMH. Life is good!


LinkWithin

Related Posts Plugin for WordPress, Blogger...