Tuesday, June 18, 2013

Practical Scrappers 10 Things Washi

This week the 10 Things team at Practical Scrappers is exploring fun ways to use Washi Tape. Since I've got Disney on the brain with my upcoming trip to CTMH Convention in Orlando, I created a cute Disney card using washi tape from Queen and Co. combined with my fav chevron pattern from For Always. The Mickey "balloons" are clear beads that I bought on eBay.
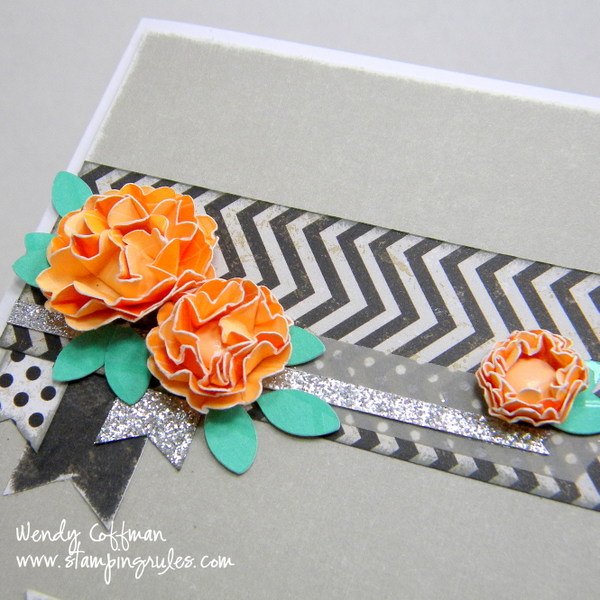
The ruffles were really fun and interesting to make. I cut lengths of rubber band and sandwiched it between two lengths of the Washi Tape. Try to keep the rubber band stretched while sticking the washi tape together - I did this by taping one side to my table while I stretched with one hand and placed the washi with the other...a second pair of hands would've been handy! Once I'd made my five lengths of ruffles I wrapped white cardstock with the flat washi tape, then adhered the ruffles I'd made down the seam lines. 
Can you see the texture of the ruffles here? Love it! I actually had to pop up the chevron paper to allow for the texture of the ruffles. I based my card on this week's adorable sketch from RetroSketches. So many cute cards out there!

Dont' forget to pop over and see what the rest of the team did with their washi!

Sunday, June 16, 2013

Convention Badges

Yesterday I finished up all my convention badges (in addition to many other projects-that-shalt-not-be-named), and normally I'd wait to share these until actual convention, but I've been missing y'all, so here's the one thing on my table I can share! Each year I make a new badge for my team buddies, so this year I made 15 total, plus that sweet but simple Eye Candy badge. And while I had to abandon my original idea for time constraints (a castle window with 3-D flowers trailing out the bottom using my Happily Ever After and Art Philosophy cartridges) I'm pretty happy with how these turned out. 

I collected funky Disney Ribbons all year just for this project. The horn and banner are cut on Happily Ever After in Tan Glitter Paper and Ruby CS, then wrapped with Washi Tape. The rosette was cut on Artiste with for Always paper, and man, does having Artiste cut and score the rosettes make them a lot more fun to make! I glued the alligator clip backs on with E-6000 (phew!) using straight pins to prop open the clips so I didn't glue them completely shut...not that I would ever do that...ahem...yes, well, anyhooo...

I'm linking this project up to the Paper Issues Persnickety Party, because even though I said they would be simple...I'm totally persnickety about my badge details (like cutting 5 different sizes of rosettes to be sure I found the perfect size, and carefully weaving the Disney phrase ribbon into the heart slide so that the words Dream Wish and Magic showed on each badge). Perhaps persnickety is my new favorite word - I'll teach Ben to use it this week!

I'm back into hibernation mode, but check back Tuesday for 10 Things about Washi tape. Happy last week before convention!

Tuesday, June 11, 2013

Practical Scrappers 10 Things Bags

This week the 10 things team is focusing on fabulous bag related craftiness! I was getting ready to skip out of town for a wedding, so I whipped up a quick card front bag.
I've featured these sweet dies before. You use the die to cut out the card stock trim, then trace the center hole of the trim onto your bag. Hack out the hole on your bag, cover the ugly hole with the cute trim piece, and slide in your top gold handmade card to instantly decorate your gift bag. 

The color is about weird in this post- the papers are For Always and Slate cardstock. It's my first practice post done entirely from my iPhone, photography to upload, practicing for my live blogging from CTMH convention. I'm planning a wrap up post each day I'm in Orlando, plus Instagram instant updates during the morning general session, so be sure to follow me if that's your cup of tea!

And don't forget to pop over and see what the rest of the Practical Scrappers did with their bags too!

Wednesday, June 5, 2013

Practical Scrappers Two Page Layouts

Today over at Practical Scrappers the ladies are showcasing two page layouts. I just LOVE a two page layout...though those one pagers are slowly growing on me... Anyhow, in the spirit of practicality (and since I'm up to my eyebrows in projects I cannot share until after convention), I shared this sweet and simple Studio J layout. 

While the layout itself is from an Express collection, I did do a bit of customization, as I wanted that picture of Gabe and Ben on the right hand side to go across two photo wells. So I loaded it up into each well, sized it up so I could only see one boy at a time, and lined up the two photos so it looks like the photo is one single piece. You can't tell a bit on my printed layout (or the jpgs I got with my purchase), so I felt pretty clever! 

20 minute (including fussy photo placement) layout is one more reason I love Studio J!

Don't forget to pop out to Practical Scrappers and take a peek at the gorgeous two pagers shared by the ladies!

Tuesday, June 4, 2013

Practical Scrappers 10 Things Scallops

This week at Practical Scrappers the 10 Things team is focused on Scallops. I used my scallops to create these adorable and super fast flowers. I based my card on this cute sketch from CAS(E) this Sketch. and I used papers from Dream Pop combined with some black/white from For Always inspired by the Color My Heart Color Dare.

Each flower requires 4 scallops. I made the flowers at 1 1/2",  1", and 3/4". You stack up the scallops and pierce through the center with a brad. I used the yellow notebook background from the big Owl print sheet from Dream Pop (if you were lucky enough to snap that fab paper up last month). After you brad your stack of scallops together, just scrunch up each layer until everything is pushed together all around your brad nice and tight, then gently separate the "petals", exposing the brad or not as you wish!

Pop out to Practical Scrappers to check out all the clever ways to use your scallops!

LinkWithin

Related Posts Plugin for WordPress, Blogger...